
Cart
0
Introduction
A high-performance dual-tube night vision system can still feel uncomfortable if it is positioned incorrectly in front of the user’s eyes.
Many users initially blame eye strain on:
-
Image intensifier tube quality
-
White phosphor or green phosphor
-
Low SNR
-
Lens distortion
-
Excessive brightness
-
Long viewing duration
Those factors may contribute to discomfort, but the problem is often more basic:
The goggles do not fit the user correctly.
Two setup areas have an especially strong effect on long-duration comfort:
-
Interpupillary distance
-
Helmet ergonomics
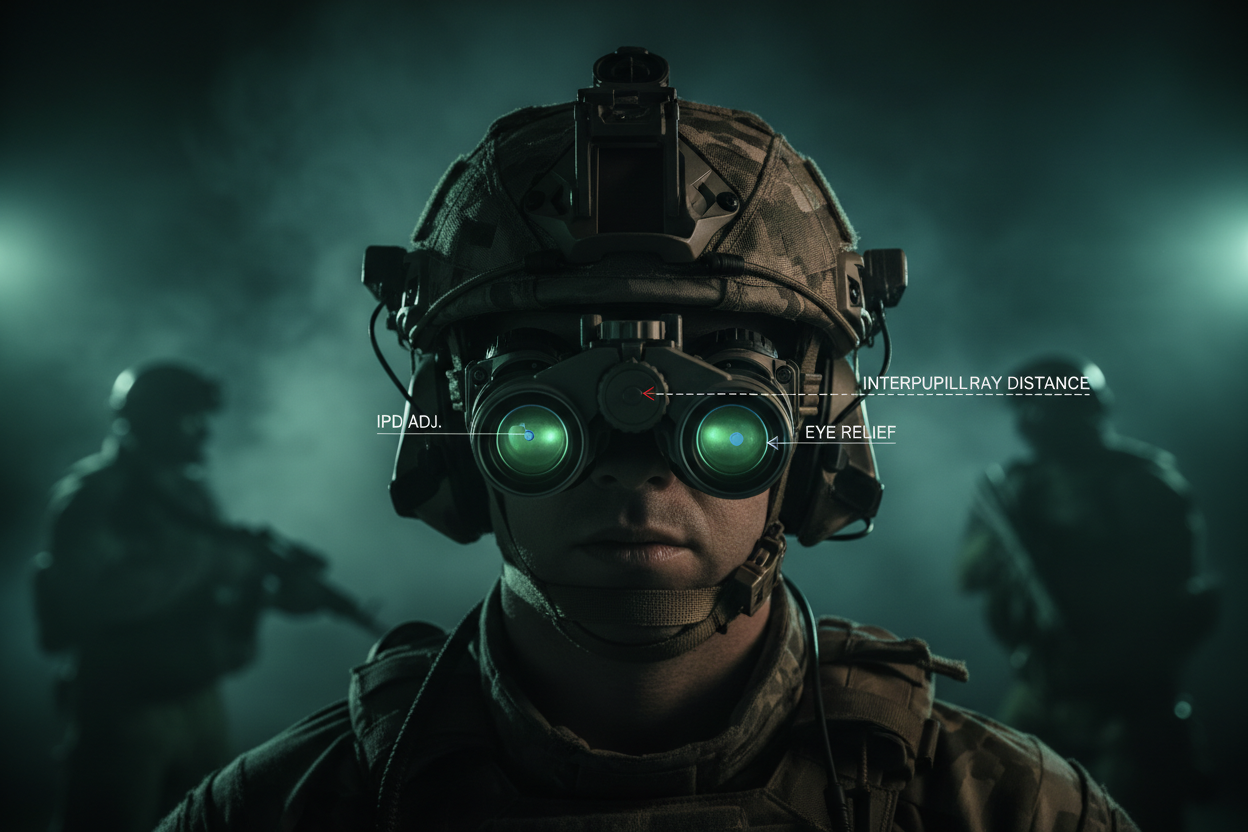
Interpupillary distance, commonly called IPD, determines whether each eyepiece is centered in front of the corresponding eye.
Helmet ergonomics determine whether the goggles stay in that position as the user walks, scans, bends, climbs or wears the system for several hours.
An incorrect IPD setting can make the eyes work harder to combine the two images.
A front-heavy or poorly adjusted helmet can cause the NVG to move gradually out of position, changing eye relief and image alignment during use.
This guide explains how IPD, eye relief, diopter settings, collimation, helmet balance and mount adjustment work together—and how to build a more comfortable dual-tube NVG setup for long operations.
To compare complete monocular and binocular systems, begin with the Night Vision collection.
What Is Interpupillary Distance?
Interpupillary distance is the distance between the centers of a person’s pupils.
Because everyone’s facial structure is different, a binocular night vision device must allow both optical channels to align with the user’s individual eye spacing.
When IPD is adjusted correctly:
-
Each eye is centered behind its eyepiece
-
Both circular images appear complete
-
The two channels combine naturally
-
The user does not need to force the eyes inward or outward
-
Peripheral dark shadows are minimized
-
The image remains comfortable during scanning
When IPD is incorrect, the user may see:
-
Partial image circles
-
Dark crescent-shaped edges
-
One image positioned farther inward or outward
-
Difficulty merging the channels
-
A feeling that one eye is doing more work
-
Faster eye fatigue
-
Reduced depth confidence
IPD is not a performance specification like FOM or SNR.
It is a fit measurement.
Even premium tubes cannot compensate for incorrect eye alignment.
Why IPD Matters More in Dual-Tube NVGs
A monocular presents an intensified image to one eye.
A dual-tube NVG presents separate intensified images to both eyes.
For binocular viewing to feel natural, the left and right optical channels must work together.
That requires:
-
Correct IPD
-
Similar eye relief
-
Correct diopter settings
-
Compatible focus
-
Consistent image size
-
Proper collimation
-
Reasonably matched tubes
A small fit problem may not feel serious during a two-minute test.
During a multi-hour patrol, search operation, training session or observation period, the same problem can become distracting.
The user may begin unconsciously:
-
Tilting the head
-
Tightening facial muscles
-
Closing one eye
-
Moving the helmet repeatedly
-
Pressing the goggles closer
-
Favoring one optical channel
These compensations can reduce comfort and situational awareness.
IPD, Eye Relief, Diopter and Collimation Are Different
Several adjustments affect binocular comfort, but they solve different problems.
| Adjustment | What It Controls | Common Sign of Incorrect Setup |
|---|---|---|
| IPD | Horizontal spacing between optical channels | Incomplete circles or difficulty merging images |
| Eye relief | Distance from eyepiece to eye | Restricted field, edge shadows or contact with eyewear |
| Mount height | Vertical position of goggles | Images sit above or below the pupils |
| Mount tilt | Angle of the optical axes | Uneven eye position or pressure against face |
| Diopter | Eyepiece focus for each user’s eyesight | Phosphor-screen detail remains blurry |
| Objective focus | Focus distance of the outside scene | Near or distant objects appear soft |
| Collimation | Alignment between left and right optical channels | Double-image feeling or persistent eye fatigue |
| Helmet balance | Stability of the complete head-mounted system | Goggles move out of position during use |
These settings should not be used to compensate for one another.
For example:
-
Do not change the diopter to fix incorrect IPD.
-
Do not overtighten the helmet to compensate for poor balance.
-
Do not move one pod vertically to hide a collimation problem.
-
Do not push the NVG excessively close to the face to recover a lost field of view.
Each problem should be corrected at its source.
How to Recognize an Incorrect IPD Setting
An IPD problem is often visible immediately when each eye is checked separately.
Possible signs include:
Incomplete Circular Images
Each optical channel should appear centered in front of its eye.
If the user sees only part of the image circle, the pods may be too close together, too far apart or vertically misaligned.
Dark Crescent Shapes
A dark crescent at one side of the image often indicates that the eye is not centered behind the eyepiece.
Constant Need to Reposition the Helmet
If the image becomes correct only after pushing the helmet left or right, the pod spacing or mount position may need adjustment.
One Eye Feels Dominant
A user may rely heavily on one channel because the other is poorly positioned, softer or less comfortable.
Eyes Feel as Though They Are Pulling Inward or Outward
This can indicate that the two optical channels are not positioned naturally for the user’s eye spacing.
Discomfort Appears Quickly
A correctly fitted binocular should not require continuous muscular effort to keep the two images combined.
A Practical IPD Adjustment Process
The exact controls vary by housing, so always follow the instructions for the specific device.
A practical setup sequence is:
1. Fit the Helmet First
Do not adjust IPD while the helmet is loose or sitting incorrectly.
The helmet should be centered, level and secured using the retention system.
2. Lower the NVG into Position
Use the mount to place the eyepieces approximately in front of the eyes.
Do not begin by pressing the device as close as possible.
3. Close One Eye
Check the complete image circle with the open eye.
Adjust the corresponding pod or device position until the image is centered.
4. Repeat for the Other Eye
Confirm that the second optical channel is centered independently.
5. Open Both Eyes
The two images should combine naturally without the user forcing eye position.
6. Check Near and Far Head Movement
Look left, right, upward and downward.
The image circles should remain usable without the helmet shifting significantly.
7. Walk Slowly
A fit that feels correct while standing may move during walking.
Recheck the position after several minutes of controlled movement.
IPD should be adjusted for the actual user wearing the complete helmet setup—not copied from another person’s configuration.
Eye Relief: The Forgotten Part of IPD Setup
Eye relief is the distance between the user’s eye and the eyepiece.
Correct IPD will not feel comfortable if the NVG is too close or too far from the face.
NVG Too Far Away
Possible effects include:
-
Reduced usable field of view
-
Stronger dark edges
-
Difficulty seeing the complete image circle
-
More sensitivity to small helmet movements
NVG Too Close
Possible effects include:
-
Eyecups or eyepieces contacting the face
-
Discomfort with protective eyewear
-
Fogging
-
Reduced airflow
-
Increased injury risk if the helmet or device receives an impact
-
Difficulty articulating the pods
The ideal position should provide the complete usable image while leaving appropriate clearance for:
-
Eyelashes
-
Protective glasses
-
Facial movement
-
Helmet movement
-
Eyecups where used
The ARGUS A4 Lightweight Night Vision Mount provides fore-and-aft, vertical and tilt adjustments for compatible dovetail-equipped systems.
Mount Height and Vertical Alignment
IPD describes horizontal eye spacing, but vertical alignment is equally important.
If the NVG sits too high or too low, the user may tilt the head to center the images.
This can create:
-
Neck discomfort
-
Poor posture
-
Restricted image circles
-
Uneven pressure from the helmet
-
Reduced scanning comfort
The user’s normal head posture should remain neutral.
The eyes should not need to look sharply upward or downward to see the center of the image.
Adjust mount height before making fine IPD changes.
A useful sequence is:
-
Center the helmet.
-
Set mount height.
-
Set fore-and-aft position.
-
Set tilt.
-
Adjust IPD.
-
Set objective focus.
-
Set each diopter.
Changing an earlier adjustment may require checking the later adjustments again.
Diopter Adjustment and Eye Strain
The diopter controls how sharply the user sees the image produced at the phosphor screen.
Each eye should be adjusted independently because the user’s left and right eyes may not have identical vision.
An incorrect diopter setting can cause:
-
Soft screen detail
-
One eye working harder
-
Difficulty combining the channels
-
Headaches
-
Blurred vision after removing the NVG
-
Reduced long-duration comfort
Do not focus the outside environment using the diopter.
The objective lens focuses the scene.
The diopter focuses the displayed image for the user’s eye.
A practical method is to set each diopter while viewing the tube’s screen detail, then use the objective lens to focus the environment.
If one channel remains difficult to focus after correct adjustment, the issue may involve:
-
Lens condition
-
Tube position
-
Optical mismatch
-
Assembly
-
Collimation
-
The user’s vision
Persistent problems should not be dismissed as normal adaptation.
Collimation Problems Can Look Like IPD Problems
Collimation refers to the alignment of the two optical channels.
A user may set the IPD correctly and still experience discomfort if the channels are not collimated properly.
Possible signs include:
-
Images that do not merge naturally
-
Vertical displacement between channels
-
Double-image sensation
-
Headaches after short use
-
One eye repeatedly taking over
-
Reduced depth perception
-
Discomfort that remains after IPD and focus adjustment
IPD changes the location of the eyepieces relative to the eyes.
It does not correct the internal optical alignment of the device.
If a binocular remains uncomfortable after careful helmet, IPD, eye-relief and focus setup, it may require professional collimation or inspection.
ARGUS describes optical collimation, tube inspection and gain matching as part of professional NVG manufacturing and quality control. For more context, read What Makes a Military-Spec Night Vision Goggle?.
Lens Distortion and Unequal Optical Paths
Each side of a dual-tube NVG should present a geometrically consistent image.
If one optical channel has more distortion, edge blur or magnification difference than the other, the brain must work harder to combine them.
This may create:
-
Eye fatigue
-
Unstable depth perception
-
A swimming sensation while scanning
-
Discomfort during head movement
-
Unequal image sharpness
Before assuming IPD is the problem, check whether:
-
Both objective lenses are the same type
-
Both eyepieces are compatible
-
Both sides focus similarly
-
One lens is dirty or damaged
-
One channel has stronger edge distortion
-
The housing has been dropped or repaired
The guide What Causes Distortion in NVGs? explains how lens design, alignment and optical quality affect binocular comfort.
How Helmet Ergonomics Affect Eye Position
A perfect IPD setting is only useful if the helmet holds the NVG in that position.
A poorly fitted helmet may:
-
Slide forward
-
Rotate to one side
-
Move vertically
-
Shift during running or climbing
-
Change eye relief
-
Pull the eyepieces away from the pupils
-
Require constant hand adjustment
As the goggles move, the user’s effective IPD alignment changes.
This is why eye strain cannot always be solved at the optical pods alone.
The full system includes:
-
Helmet shell
-
Pads
-
Retention system
-
Shroud
-
NVG mount
-
Dovetail interface
-
Night vision device
-
Battery pack
-
Cables
-
Additional accessories
Every component affects stability.
Why Front-Heavy Helmets Cause More Than Neck Fatigue
An NVG sits forward of the head.
This creates leverage rather than only adding vertical weight.
A front-heavy system may gradually pull the helmet down and forward.
That movement can change:
-
Eye relief
-
Mount tilt
-
Image centering
-
Pod alignment relative to the eyes
-
User posture
The user may compensate by tightening the chin strap excessively or leaning the head backward.
That may improve the image temporarily while increasing discomfort elsewhere.
For long operations, a balanced helmet helps preserve the optical setup.
The goal is not simply comfort.
It is keeping the goggles in the same calibrated position throughout movement.
Functional Counterbalance with a Battery Pack
A rear battery pack can offset some of the forward pull created by the NVG.
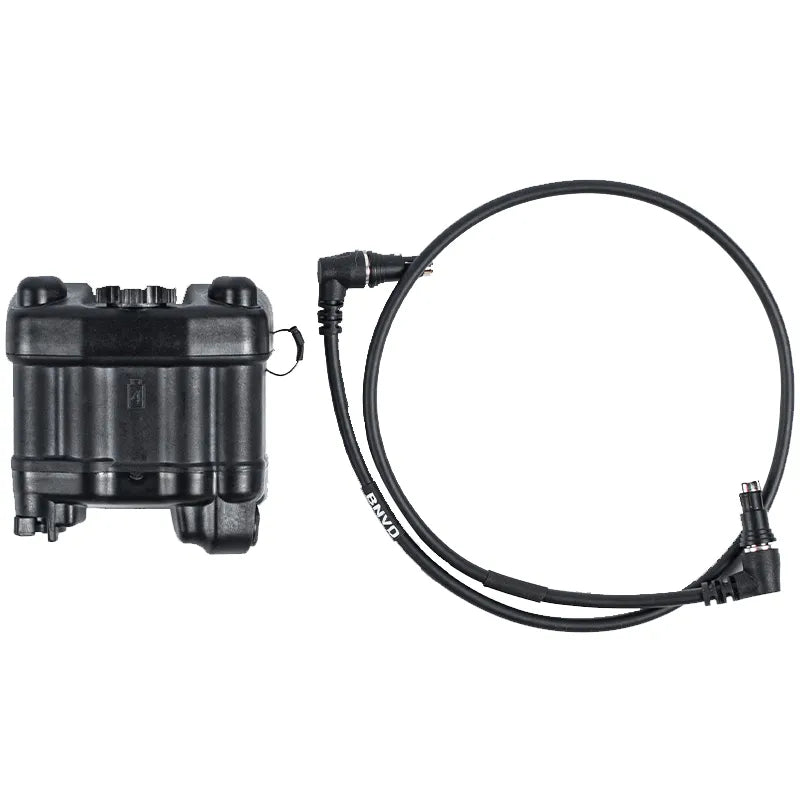
The ARGUS Universal Strobe Battery Pack can provide external power to compatible devices through the correct cable while serving as functional rear helmet weight.
A battery pack does not reduce total system weight.
It redistributes weight.
The correct counterbalance should help the helmet remain neutral without making it rear-heavy.
When adjusting rear weight:
-
Install the complete front setup.
-
Include mounts, lens accessories and thermal modules normally used.
-
Position the battery pack securely near the helmet centerline.
-
Adjust the retention system.
-
Look up, down and sideways.
-
Walk and kneel.
-
Confirm that the helmet does not slide forward or backward.
For more detail, read Managing NVG Weight: Why You Need a Strobe Battery Pack for Helmet Balance.
Do Not Overtighten the Helmet
A loose helmet causes instability, but an excessively tight helmet can create different problems.
Possible signs of overtightening include:
-
Pressure points
-
Forehead discomfort
-
Headache
-
Jaw or chin-strap discomfort
-
Reduced tolerance during long use
-
Numbness or irritation around contact areas
The helmet should be secure enough to resist movement without requiring painful pressure.
Adjustments should include:
-
Correct helmet size
-
Appropriate pad placement
-
Balanced retention tension
-
Correct rear support
-
Stable shroud and mount
-
Reasonable counterbalance
Counterweight should not be used to compensate for an incorrectly sized helmet.
Articulating Pods and IPD Consistency
Articulating binocular housings allow the pods to move independently.
The BNVD-1431 MK2 housing kit uses independently articulating pods, allowing users to move between dual-eye and single-eye configurations.
Articulation is useful, but users should check whether the pods return to the same viewing position after being raised and lowered.
After moving a pod:
-
Confirm that the image circle is centered
-
Check the effective IPD
-
Confirm that the pod has fully returned
-
Recheck eye relief
-
Look for cable or accessory interference
A pod that stops slightly short of its normal position can create an apparent IPD or alignment problem.
Accessories Can Change Helmet Ergonomics
The helmet may fit correctly with the base NVG but become uncomfortable after adding:
-
COTI
-
Lens protectors
-
IR illuminator
-
Heavier objective lenses
-
External cables
-
Cameras
-
Identification lights
Every accessory changes total weight and center of gravity.
After adding or removing equipment, recheck:
-
Helmet balance
-
Mount stability
-
Eye relief
-
IPD
-
Cable tension
-
Pod movement
-
Retention-system pressure
Do not assume that one helmet setup works for every configuration.
Available mounts, battery packs and compatible support products can be found in the Night Vision Accessories collection.
Long-Duration Comfort Checklist
Before use:
-
Confirm that the helmet size is correct.
-
Center the helmet on the head.
-
Install the complete operational NVG configuration.
-
Balance the front and rear load.
-
Set mount height and tilt.
-
Set fore-and-aft eye relief.
-
Center each eyepiece separately.
-
Adjust IPD.
-
Set each diopter independently.
-
Focus both objective lenses.
-
Confirm that the two images merge comfortably.
-
Check that cables do not pull on the housing.
During use:
-
Recheck image position after active movement.
-
Notice whether one eye is becoming dominant.
-
Check for helmet movement when looking upward.
-
Reduce unnecessary display brightness or gain.
-
Take appropriate visual and physical breaks when conditions allow.
-
Recheck pod position after articulation.
-
Stop if double vision, severe discomfort or persistent visual disturbance develops.
After use:
-
Record any recurring discomfort.
-
Inspect the mount and dovetail.
-
Check whether the helmet pads shifted.
-
Inspect both optical channels.
-
Confirm that the pods return to the same position.
-
Arrange professional inspection if discomfort persists despite correct setup.
Common Setup Mistakes
Adjusting IPD Before Fitting the Helmet
The setting may change when the helmet is tightened or balanced.
Pushing the NVG Too Close
This may improve the apparent field temporarily while creating facial contact and poor ergonomics.
Ignoring Vertical Alignment
Correct horizontal spacing cannot compensate for a device positioned too high or low.
Setting Both Diopters to the Same Number Automatically
Each eye should be adjusted based on actual visual clarity.
Using Counterweight to Fix a Loose Helmet
The correct solution may be helmet sizing, pad placement or retention adjustment.
Continuing Through Persistent Eye Strain
Severe or recurring discomfort may indicate collimation, optical mismatch or a personal vision issue.
Copying Another User’s Setup
IPD, facial geometry, helmet fit and eye relief are individual.
Frequently Asked Questions
Can Incorrect IPD Cause Eye Strain?
Incorrect IPD can make binocular images harder to combine and may contribute to fatigue or discomfort. Other causes include poor diopter adjustment, unequal focus, collimation problems, optical distortion and helmet movement.
Should Both Image Circles Overlap Perfectly?
Each eye should receive a complete, centered image. The brain combines the two channels into one binocular view; the user should not need to force the images together.
How Close Should NVGs Sit to the Eyes?
They should be close enough to provide the intended field of view while maintaining safe and comfortable clearance for eyelashes, facial movement and protective eyewear.
Can a Battery Pack Reduce Eye Strain?
Not directly. A rear battery pack may improve helmet balance and stability, helping the goggles maintain correct eye position during long use.
Why Does My IPD Feel Correct at First but Wrong Later?
The helmet may be shifting, pads may be compressing, the mount may be moving or front-heavy weight may be pulling the device out of position.
Can IPD Adjustment Fix Double Vision?
It can correct eye-spacing mismatch, but it cannot fix internal optical misalignment or poor collimation.
Should Eye Strain Be Considered Normal?
A brief adaptation period may occur, but persistent pain, double vision, significant headache or prolonged blurred vision should not be ignored. Stop using the system, recheck the setup and obtain appropriate technical or eye-care evaluation when needed.
Final Thoughts
Long-duration NVG comfort depends on more than image intensifier specifications.
A dual-tube system must fit the user as a complete head-mounted optical system.
Correct IPD helps position each eyepiece in front of the corresponding pupil.
Correct eye relief preserves the usable field of view without pressing the device against the face.
Correct diopters allow each eye to see the phosphor-screen image clearly.
Proper collimation allows both optical channels to combine naturally.
Balanced helmet ergonomics keep all of those adjustments stable during movement.
The best setup process is therefore:
-
Fit the helmet
-
Balance the total load
-
Adjust the mount
-
Set eye relief
-
Center each optical channel
-
Adjust IPD
-
Set focus and diopters
-
Test while moving
-
Recheck after extended wear
Do not treat repeated eye strain as an unavoidable cost of using dual-tube NVGs.
In many cases, discomfort is useful feedback that something in the optical fit, helmet balance or mechanical alignment needs attention.
A capable night vision system should not only produce a clear image.
It should hold that image steadily and comfortably in front of the user’s eyes throughout the operation.