
Cart
0
Introduction
A quality binocular night vision goggle already provides a major advantage over unaided vision in low-light environments.
Dual image intensifier tubes can improve:
-
Depth perception
-
Terrain recognition
-
Natural movement
-
Obstacle awareness
-
Long-duration viewing comfort
-
Overall situational awareness
However, conventional analog night vision has an important limitation:
It amplifies available light, but it does not directly detect heat.
A person standing in deep shadow, an animal hidden in vegetation, or a recently operated vehicle may not immediately stand out through image intensification alone. This is why many advanced users consider adding a Clip-On Thermal Imager, commonly called a COTI, to their binocular NVGs.
The JERRY-C5 family is designed to add thermal information to an existing night vision image rather than forcing the user to switch between separate night vision and thermal devices.
On the ARGUS website, the currently listed model is the JERRY-CE5. In this guide, “JERRY-C5” refers to the commonly searched C5-series platform, while JERRY-CE5 refers specifically to the product currently listed by ARGUS.
This guide explains how COTI integration works, what to check before attaching a JERRY-C5 or JERRY-CE5 to binocular NVGs, how to manage power and helmet balance, and whether thermal fusion is the right upgrade for your system.
What Is a JERRY-C5 COTI?
A JERRY-C5 COTI is a compact thermal imaging device designed to attach to an existing night vision optic.
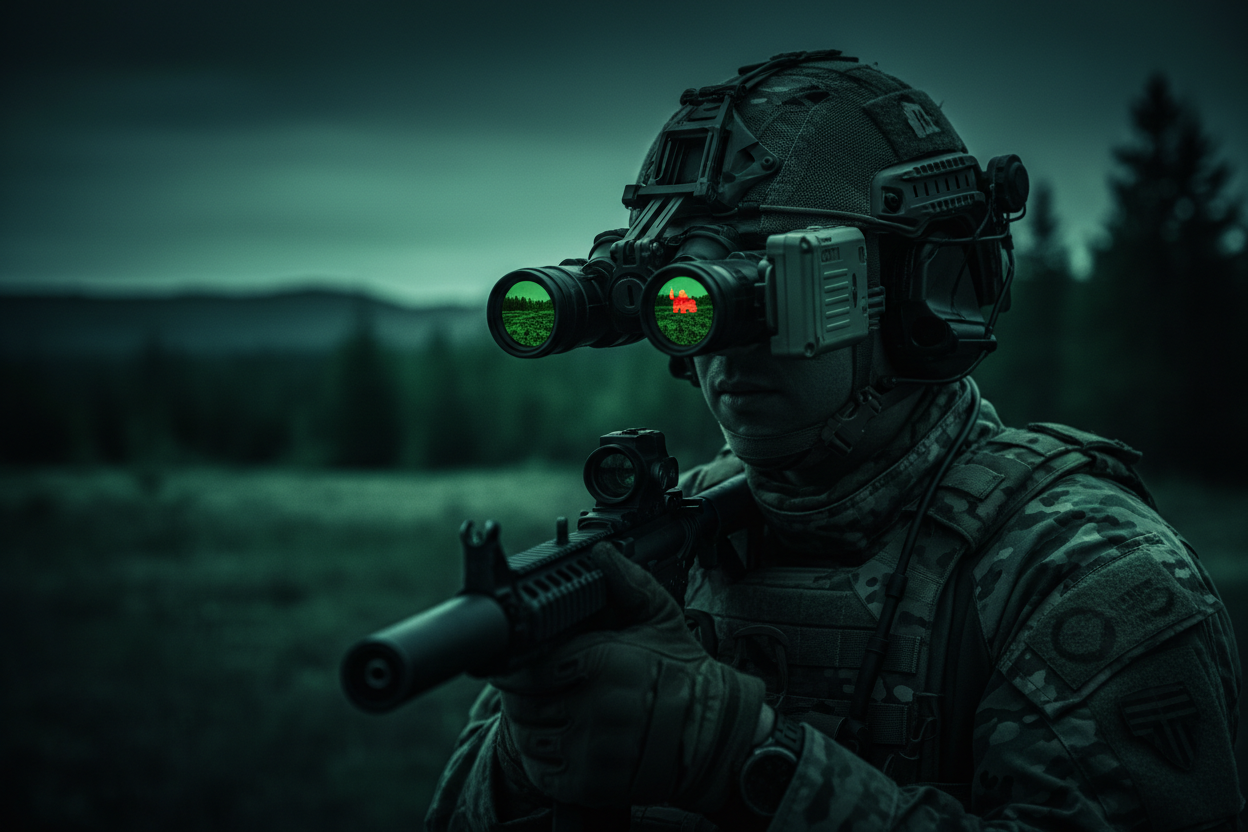
Instead of replacing the intensified night vision image, the COTI adds thermal information to it.
This creates a fusion-style view that combines:
-
Image-intensified environmental detail
-
Thermal detection of warm objects
The night vision tubes continue to show terrain, roads, vegetation, buildings, obstacles, and other visual details.
The thermal overlay helps highlight heat signatures.
This can make it easier to detect:
-
People in low-contrast environments
-
Animals standing in vegetation
-
Warm vehicles or equipment
-
Heat sources in complete darkness
-
Objects that visually blend into the background
ARGUS’s existing guide on Clip-On Thermal Imagers and NVG fusion systems explains that a COTI adds thermal detection cues while preserving the navigation and scene-recognition advantages of analog night vision.
Why Binocular NVGs Are an Excellent COTI Host
A COTI can be used with compatible monocular or binocular night vision systems, but binocular NVGs provide a particularly strong foundation.
Binocular night vision gives imagery to both eyes. This generally provides a more natural viewing experience than using a single monocular.
Common binocular advantages include:
-
Better depth perception
-
More natural movement
-
Reduced visual imbalance between the eyes
-
Easier obstacle navigation
-
Greater comfort during extended use
Adding thermal overlay to this foundation gives the user two complementary types of information:
-
Image intensification for movement and environmental detail
-
Thermal imaging for heat detection
This is why a COTI-equipped binocular system can feel more complete than either technology used alone.
Users comparing binocular systems can browse the binocular night vision collection or review the broader Night Vision collection.
Night Vision, Thermal and Fusion: What Each Technology Does
Before adding a COTI, it is important to understand what each technology contributes.
Analog Night Vision
Image intensifier tubes amplify available light.
They are especially useful for:
-
Moving through terrain
-
Recognizing roads and trails
-
Seeing buildings and obstacles
-
Understanding environmental structure
-
Maintaining natural spatial awareness
Night vision is excellent for navigation, but low-contrast warm objects may still blend into the scene.
Standalone Thermal Imaging
Thermal imagers detect infrared energy emitted by objects.
They are especially useful for:
-
Detecting people or animals
-
Locating warm equipment
-
Observing in total darkness
-
Identifying heat contrast
-
Scanning visually complex terrain
However, thermal images may not provide the same natural depth cues or terrain detail as analog night vision.
COTI Fusion
A COTI combines the strengths of both systems.
The user retains the intensified night vision image while receiving additional thermal cues.
The result can support:
-
Faster detection
-
Better awareness in visual clutter
-
Reduced need to switch devices
-
More efficient scanning
-
Improved low-light information processing
A COTI does not turn the NVG into a perfect all-purpose thermal system. It adds a thermal detection layer to an existing night vision platform.
Choosing the Right Binocular NVG Platform
Before purchasing a JERRY-C5 or JERRY-CE5, confirm that the host binocular is physically and optically suitable for COTI integration.
Potential host platforms may include:
-
PVS-31-style binoculars
-
BNVD-1431 MK2 systems
-
Other BNVD platforms
-
DTNVG or DTNVS-style systems
-
RNVG-style systems
-
Compatible binoculars using PVS-14-style objective optics
Compatibility should never be assumed from appearance alone.
Check:
-
Objective lens dimensions
-
COTI attachment method
-
Available clearance around the optical pod
-
Pod articulation
-
Cable routing
-
Helmet mount clearance
-
Manufacturer or seller recommendations
The BNVD-1431MK2 housing kit with lenses uses standard 18 mm image intensifier formats, supports PVS-14-standard lenses, articulating pods and external battery operation, making it an example of the type of modular binocular platform buyers may evaluate for a complete helmet-mounted setup.
Which Side Should the COTI Be Mounted On?
A COTI is normally attached to one optical channel rather than both sides of the binocular.
The best side depends on:
-
Eye dominance
-
Device controls
-
Cable direction
-
Pod articulation
-
Helmet accessories
-
Personal preference
Some users prefer placing the COTI on the dominant-eye side because that eye naturally leads visual interpretation.
Others prefer the non-dominant side to keep the dominant channel visually cleaner.
There is no universally correct side.
The most practical method is to test both configurations and compare:
-
Comfort
-
Thermal overlay visibility
-
Eye fatigue
-
Pod movement
-
Cable interference
-
Access to controls
-
Overall balance
Do not permanently organize cables or attachment straps until you have tested both sides.
Why Proper Optical Alignment Matters
The thermal overlay must appear in a useful position relative to the intensified image.
If alignment is poor, heat signatures may appear displaced, distracting, or difficult to interpret.
Proper setup should help the thermal information feel connected to the night vision scene.
Alignment can be affected by:
-
Attachment position
-
Adapter fit
-
Objective lens geometry
-
COTI angle
-
Pod position
-
User eye position
-
Helmet mount adjustment
After installation, test the system using several clearly recognizable warm objects at different distances.
Check whether:
-
The overlay is centered appropriately
-
Heat signatures appear in a logical position
-
The attachment remains stable
-
The image changes when the pod moves
-
The COTI shifts after the NVG is raised or lowered
A secure attachment is essential. Even small movement can make the thermal overlay less intuitive.
Understanding Thermal Overlay Modes
COTI systems may provide different ways of presenting thermal information.
Common concepts include:
Outline Mode
Outline mode emphasizes the edges of detected heat signatures.
This can preserve more of the original night vision scene while drawing attention to warm objects.
It may be useful when the user wants thermal assistance without covering too much environmental detail.
Highlight Mode
Highlight mode places stronger emphasis on detected heat.
It may improve rapid detection, but excessive highlighting can make a complex scene feel crowded.
Full or Stronger Thermal Display
A stronger thermal presentation may be useful for scanning, but it can reduce the natural appearance of the intensified scene.
The best mode depends on:
-
Terrain
-
Temperature contrast
-
Target distance
-
Weather
-
Vegetation
-
User experience
-
Whether navigation or detection is the priority
More thermal information is not always better.
During movement, a restrained outline mode may feel more natural. During a deliberate scan, stronger highlighting may be more useful.
Why Brightness Adjustment Matters
The thermal overlay should support the intensified image rather than overpower it.
If the overlay is too bright, it can:
-
Distract the user
-
Cover environmental detail
-
Increase visual fatigue
-
Make movement feel less natural
-
Reduce the value of the analog image
If it is too dim, heat signatures may be easy to miss.
The ideal setting changes with the environment.
In a cold environment, warm objects may stand out strongly and require less overlay intensity.
In warm weather, background surfaces may retain heat, reducing contrast and requiring more careful adjustment.
Users should practice adjusting:
-
Overlay brightness
-
Detection threshold
-
Image mode
-
Night vision gain where available
-
Diopter and objective focus
A fusion system works best when both technologies are balanced.
Power Planning for JERRY-C5 and JERRY-CE5 Integration
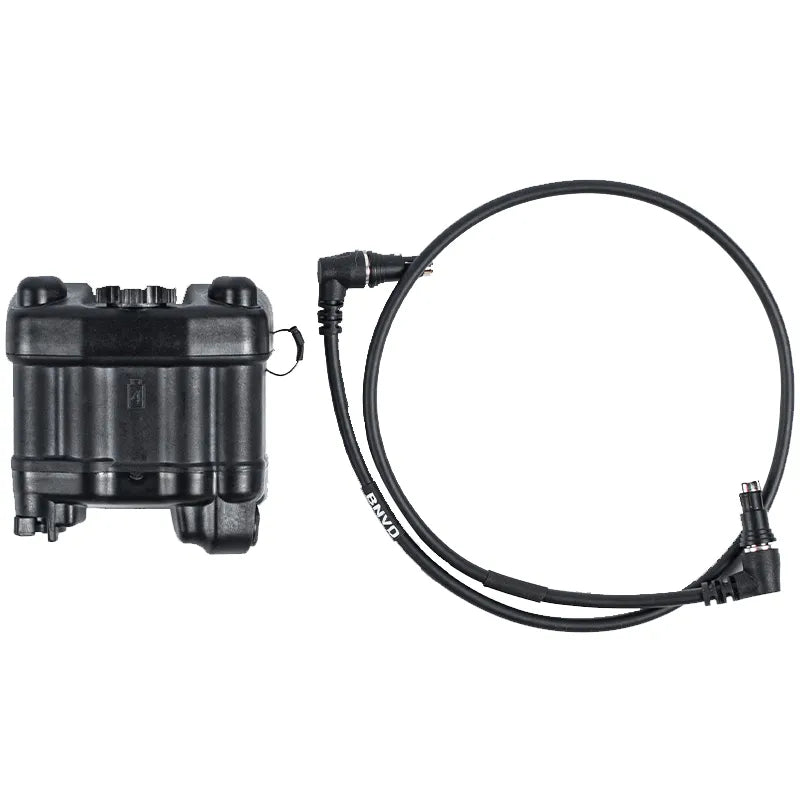
Adding a thermal device introduces another power requirement.
Your complete system may now include:
-
Binocular NVG power
-
COTI power
-
External battery pack
-
Connection cable
-
Backup batteries
Before use, confirm:
-
Which battery configuration the exact COTI variant requires
-
Whether external power is necessary
-
Expected runtime
-
Battery performance in cold weather
-
Cable and connector compatibility
-
Whether the battery pack can be replaced quickly
-
Whether backup batteries are carried securely
Do not assume that the COTI and binocular NVG use the same power connection.
The COTI power source may be independent from the NVG battery system.
Labeling cables and keeping a clear power plan can prevent confusion during low-light use.
Cable Management
Poor cable management is one of the easiest ways to make a thermal fusion setup uncomfortable or unreliable.
Loose cables can catch on:
-
Helmet rails
-
Clothing
-
Vegetation
-
Vehicle interiors
-
Mount controls
-
Other helmet accessories
Good cable routing should be:
-
Secure
-
Low profile
-
Easy to inspect
-
Free from excessive tension
-
Compatible with pod articulation
-
Clear of the NVG mount
-
Easy to disconnect when necessary
Leave enough slack for normal movement, but not so much that the cable forms large loops.
Before finalizing the setup, test:
-
Raising and lowering the NVG
-
Articulating both pods
-
Turning the head fully left and right
-
Looking upward and downward
-
Removing the device from the mount
-
Changing batteries
A cable path that works while standing still may fail during real movement.
The Added Weight Problem
A COTI is compact, but it still adds weight to the front of the helmet.
The effect may feel larger than the actual device weight because the accessory sits forward of the helmet’s center.
Adding a COTI can increase:
-
Forward helmet pull
-
Neck fatigue
-
Chin-strap pressure
-
Helmet movement
-
Discomfort during long sessions
This is why helmet balance should be reconsidered after installing the thermal device.
Do not balance the helmet using only the binocular NVG.
Balance it with the complete operational setup installed, including:
-
NVG
-
COTI
-
Mount
-
Cables
-
Lens protectors
-
Lights or other front accessories
The guide on managing NVG weight with a rear battery pack explains why front-mounted accessories create additional leverage and why functional rear weight can improve long-duration comfort.
Using a Rear Battery Pack as Functional Counterbalance
A rear-mounted battery pack can support the system in two ways:
-
It can provide external power where compatible.
-
It can counterbalance front-mounted equipment.
The ARGUS Universal Strobe Battery Pack is designed for rear helmet mounting and can act as a counterweight while supplying compatible night vision devices through the appropriate cable or adapter.
A battery pack does not make the helmet lighter.
It redistributes the weight to create a more neutral balance.
The goal is not to add as much rear weight as possible. Too much counterweight can make the helmet rear-heavy.
Adjust the position and total load until:
-
The helmet does not slide forward
-
Looking upward feels comfortable
-
The retention system remains secure
-
The helmet stays stable while walking
-
Neck effort feels balanced
Why the NVG Mount Still Matters
Adding a COTI increases the importance of a stable night vision mount.
A weak or loose mount may allow the complete optical system to move.
Movement can affect:
-
Eye position
-
Thermal alignment
-
Viewing comfort
-
Repeatability after raising and lowering the device
The ARGUS A4 Light Weight Night Vision Mount supports standard dovetail-equipped monocular and binocular systems, including BNVD-1431, BNVD-931, PVS-31-style and other compatible platforms.
When evaluating a mount for a fusion setup, consider:
-
Dovetail lockup
-
Vertical adjustment
-
Fore-and-aft adjustment
-
Tilt
-
Return-to-position consistency
-
Helmet-shroud compatibility
-
Breakaway or safety-release design
-
Total weight
A thermal overlay is less useful if the optical system does not return to the same position after being flipped up.
Image Intensifier Tube Quality Still Matters
Adding a COTI does not compensate for a poor image intensifier tube.
The night vision image remains the visual foundation of the fusion system.
Tube quality affects:
-
Environmental detail
-
Image noise
-
Low-light clarity
-
Contrast
-
Edge recognition
-
Viewing comfort
-
Performance around mixed lighting
Important tube specifications still include:
-
FOM
-
SNR
-
Resolution
-
EBI
-
Halo
-
Autogating
-
Phosphor type
-
Tube cosmetics
A thermal overlay can help reveal heat, but users still need a clean and usable intensified image for navigation.
Buyers building or upgrading a binocular system can compare current options through the Image Intensifier Tube collection.
P43 Green Phosphor or P45 White Phosphor for Fusion?
Both green and white phosphor tubes can support a COTI system.
P43 Green Phosphor
Green phosphor provides the traditional night vision image.
Some users value:
-
Familiarity
-
Strong perceived brightness
-
Classic NVG appearance
P45 White Phosphor
White phosphor provides a grayscale-style image.
Many users prefer it for:
-
Natural scene interpretation
-
Perceived contrast
-
Long-duration comfort
-
Easier separation of thermal highlights from the underlying image
The best choice remains personal.
However, tube matching is especially important in binocular systems. Both optical channels should be reasonably consistent in brightness, phosphor tone, gain and image quality.
Best Uses for a JERRY-C5 Binocular Fusion Setup
A COTI-equipped binocular system may be useful for:
Search and Rescue
Thermal cues can help identify warm objects or people in vegetation, uneven terrain or darkness.
Wildlife Observation
Animals that visually blend into the background may become easier to detect.
Users should follow all applicable regulations.
Perimeter and Property Observation
Thermal overlay can assist with identifying movement and heat contrast around structures or open areas.
Night Patrol and Security
A fusion system can help users scan mixed environments while retaining normal night vision navigation.
Training
Users can learn how thermal signatures change with distance, weather, vegetation and background temperature.
Outdoor Navigation Support
Thermal should not replace terrain awareness, but it can provide additional information about people, animals and warm objects near the route.
COTI vs a Standalone Thermal Monocular
A COTI and a standalone thermal monocular serve different purposes.
Choose COTI When:
-
You already own quality binocular NVGs
-
You want a hands-free thermal overlay
-
You want to retain analog night vision navigation
-
You need faster heat detection while moving
-
You do not want to switch constantly between devices
Choose a Standalone Thermal Monocular When:
-
Thermal image detail is the main priority
-
You scan from a stationary position
-
You want thermal-only observation
-
You do not need the thermal image integrated into the NVG
-
You want a device that can be shared or used independently
A standalone thermal device may provide a more complete thermal image.
A COTI provides more convenient integration with helmet-mounted night vision.
Some advanced users use both: COTI for continuous awareness and standalone thermal for deliberate inspection.
COTI vs Dedicated Fusion Binoculars
Dedicated fusion binoculars integrate thermal and image intensification into a single system.
They can offer a highly integrated experience, but they may also be:
-
More expensive
-
Less modular
-
Harder to upgrade
-
More dependent on proprietary components
A JERRY-C5 or JERRY-CE5 allows users to upgrade compatible binocular NVGs they already own.
This modular approach can provide:
-
Lower entry cost than replacing the entire system
-
Easier removal when thermal is not needed
-
Continued use of the original binocular NVG
-
More flexibility in system configuration
-
A simpler upgrade path
The trade-off is that the user must manage an additional attachment, power source, cable and front-mounted weight.
Step-by-Step Integration Checklist
Before using a JERRY-C5 or JERRY-CE5 with binocular NVGs, follow this checklist.
Step 1: Confirm the Exact Product Variant
Verify the model name, included accessories, power configuration and attachment system.
The current ARGUS listing is the JERRY-CE5.
Step 2: Confirm Host Compatibility
Check the binocular objective lenses, housing design and attachment clearance.
Step 3: Inspect the NVG
Make sure the lenses, pods, dovetail and controls are working correctly before adding another device.
Step 4: Install the COTI Carefully
Follow the appropriate attachment procedure and avoid overtightening parts against optical surfaces.
Step 5: Test Both Optical Channels
Compare left-side and right-side installation before selecting the final position.
Step 6: Align the Thermal Overlay
Use recognizable warm objects at different distances to evaluate placement and stability.
Step 7: Adjust Overlay Brightness
Keep the thermal image visible without allowing it to overpower environmental detail.
Step 8: Route the Cable
Make sure the cable does not interfere with articulation, mount controls or helmet movement.
Step 9: Rebalance the Helmet
Adjust the rear battery pack, counterweight, helmet pads and retention system with the complete setup installed.
Step 10: Practice in Several Environments
Test the system in open terrain, vegetation, structures, cold conditions and warmer backgrounds before relying on it for serious use.
Common Integration Mistakes
Mistake 1: Assuming Every Binocular Is Compatible
Similar-looking objective lenses do not guarantee compatibility.
Mistake 2: Ignoring the Exact Model Name
C5 and CE5 listings may not represent identical packages. Confirm the exact product being purchased.
Mistake 3: Using Too Much Thermal Overlay
An overly bright overlay can hide environmental detail and increase visual fatigue.
Mistake 4: Forgetting Helmet Balance
The system must be balanced again after adding the COTI.
Mistake 5: Poor Cable Routing
Loose or tight cables can interfere with pod movement and helmet use.
Mistake 6: Expecting Dedicated-Thermal Image Quality
A COTI is primarily a detection enhancement system, not a replacement for every standalone thermal device.
Mistake 7: Skipping Training
Thermal signatures change with weather, distance, terrain and object temperature.
Mistake 8: Neglecting Lens Protection
The added attachment increases the number of exposed optical surfaces and connection points.
Compatible protection and accessories can be found in the Accessories collection.
Is the JERRY-C5 COTI Upgrade Worth It?
The upgrade may be worth considering if you:
-
Already own capable binocular NVGs
-
Need faster heat detection
-
Use night vision for extended periods
-
Work in vegetation or visually cluttered terrain
-
Prefer hands-free thermal awareness
-
Want a modular fusion upgrade
-
Are prepared to manage power, cables and helmet balance
It may not be the best choice if you:
-
Are still building your first basic NVG setup
-
Mainly need long-range thermal observation
-
Prefer a lightweight helmet
-
Do not regularly benefit from thermal detection
-
Have not confirmed binocular compatibility
-
Need a completely independent thermal device
For new users, investing first in strong binocular NVGs, a stable mount, reliable tubes and a balanced helmet may provide more value.
For experienced users with a complete night vision system, COTI can be one of the most meaningful next upgrades.
Final Verdict
Integrating a JERRY-C5-series COTI with binocular NVGs creates a system that combines two valuable capabilities.
Analog night vision provides:
-
Terrain detail
-
Natural movement
-
Depth perception
-
Environmental structure
Thermal overlay provides:
-
Heat detection
-
Faster visual alerts
-
Better performance in visual clutter
-
Additional information in complete darkness
Together, they can create a more capable fusion-style viewing system.
However, successful integration requires more than clipping a thermal device onto an objective lens.
Users must consider:
-
Exact model and power configuration
-
Binocular compatibility
-
Optical alignment
-
Overlay settings
-
Cable routing
-
Helmet balance
-
Mount stability
-
Tube quality
-
Training
For users who already own a compatible binocular system, the JERRY-CE5 offers a path toward thermal fusion without replacing the entire night vision platform.
The best upgrade is not simply the one with the most technology.
It is the one that integrates cleanly, stays balanced, preserves the original NVG image and gives the user useful thermal information without unnecessary distraction.