
Cart
0

Every night vision manufacturer sells complete units. Far fewer talk about the fact that a large share of what actually ships is a night vision housing kit with no tubes in it. Buyers who already own a tube, or who intend to source one separately, skip the complete unit and buy the shell. It is a legitimate path and often the smarter one, but it fails in predictable ways. This article covers what is inside a kit, what fits it, the four things that are not in the box, and how to decide which path suits you.
What a night vision housing kit actually contains
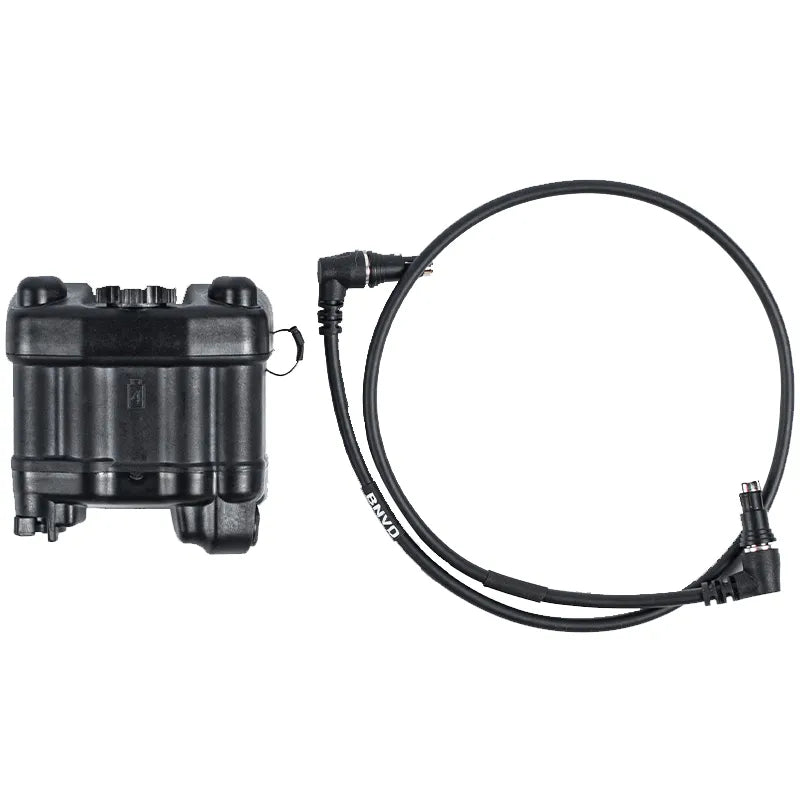
Take the BNVD-1431 MK2 as the worked example. The bare kit is the two pods, the bridge carrying the electronics, the hinges, the battery compartment and the dovetail. The electronics are not trivial: the bridge holds the gravity sensor that cuts power on flip-up, the motion sleep timer, the one-button programmable interface and the infrared flood control. No tubes, no lenses.
Step up to the kit with lenses and you add two objective and two eyepiece assemblies. Compare that against the complete unit with a matched pair of Gen 2+ tubes and the difference between the two is essentially the price of the tubes.
The same structure applies across the range. The PVS-31 housing kit with lenses is a complete optical assembly waiting for tubes, and the four-tube panoramic housing ships with its hard case, mount, battery pack and filters, again with the tubes as the open variable. Browsing the full night vision range side by side makes the pattern obvious: the housing is a fixed cost and the tubes are where the money moves.
Which tubes fit
The 1431 MK2 is built around the MX-10160 18 mm format. MX-11769 tubes fit after a minor modification to the pod. Three-pin manual gain tubes and flying-wire tubes both work, and once installed per the tube installation manual the housing's power switch rotates to control gain. With a plain two-contact tube the switch is on and off only.
Two hard limits are worth stating plainly. A 16 mm tube does not fit an 18 mm housing and no adapter changes that. And "minor modification" means bench work with the pod open, which means the pod has to be purged afterwards, so factor that in before you buy an MX-11769 for a 1431.
If you are shopping for the tube rather than the housing, our image intensifier tube listings publish the serial number and the measured figure of merit for each individual tube rather than a marketing bracket, which is the level of detail you want before committing to a build. The underlying US military specifications that define these tube formats are catalogued publicly; the Defense Logistics Agency's ASSIST specification database is the authoritative place to confirm what a given MIL-PRF number covers.
Which lenses fit
The housing accepts standard PVS-14 pattern objectives, which is the single biggest practical advantage of this format: surplus and aftermarket glass is genuinely plentiful and priced by a competitive market. It also takes commercial 40 degree and 51 degree lens sets, and ultra-light resin lenses.
Lens choice moves the finished weight across a 500 to 580 gram band, and it moves the field of view. If weight matters more to you than maximum field, the ultra-light PVS-14 style lens set pushes a finished goggle toward the lighter end of that range. If field of view matters more, a 51 degree set costs weight and usually some edge sharpness. There is no universally correct answer, which is exactly why housings are sold without lenses.
The four things that are not in the box
This is where self-builds go wrong. None of the following ships with a housing kit, and all four are needed to finish the job properly.
Correct tools. Retaining rings and objective lock rings need spanners that actually fit their slots. Pliers mark the rings and, more expensively, damage the threads. The night vision device assembly tool set is the same pattern our own line uses.
A way to purge. A sealed pod holds dry nitrogen so the internal glass does not fog when you step from a warm vehicle into cold air. Every time you open a pod you admit humid room air. The housing carries a purge valve fitting so it can be refilled, but you also need a dry nitrogen supply, a way to dry the assembly first, and a leak check afterwards. Skipping the leak check is why some rebuilt goggles fog three months later rather than three days later.
A way to set diopter and check collimation. On a binocular the two tubes must be collimated so your eyes are not fighting each other. A diopter tube test device lets you set and verify diopter on the bench. Full collimation and gain matching are done on dedicated test equipment; Hoffman Engineering manufactures the ANV-126A bench that is the industry reference for those measurements. If you are building one goggle you are not buying one of those, which is why a self-built binocular can feel subtly wrong after twenty minutes even when both tubes individually test fine.
A tube data sheet. A tube with no sheet is a tube you cannot troubleshoot, cannot value and cannot match to a partner. Insist on resolution, signal-to-noise ratio and the measured figure of merit with a serial number attached.
Cost, honestly
The housing route saves money in exactly one scenario: you already own suitable tubes, or you can buy them at a better price than they are bundled at. If you are buying tubes and a housing separately at retail, the saving over a complete unit is usually small, and it disappears entirely the first time you have to pay someone to purge and collimate a build you could not finish.
What the housing route genuinely buys you is control. You choose the tube grade, the phosphor, the gating, the gain interface and the lens set independently instead of taking a bundled configuration. For a second goggle, or for a build with a specific mission profile, that control is worth real money.
What the kit route costs you in time
Money is the obvious axis, but time is the one people underestimate. A first build is rarely a single evening. Tubes have to be inspected and their data sheets read, rings have to come off without damage, the tubes have to seat and clock correctly so the screens are square to your eyes, the pods have to be closed and purged, and then the whole assembly has to be checked and, on a binocular, collimated.
None of those steps is difficult in isolation. What makes them expensive is that a mistake at any one of them is discovered at the end. A fingerprint on a tube faceplate is invisible until the goggle is sealed and powered. A tube rotated a few degrees off is not obvious until you have worn the goggle for an hour and your eyes are tired. A pod that was closed on a slightly pinched seal passes every bench check and then fogs six weeks later on the first cold morning.
The practical answer is to sequence the work so failures are caught early: inspect and photograph tubes before installation, dry-fit everything before final torque, power the assembly and look through it before purging, and purge only once you are satisfied with the optical result.
Where housing kits genuinely win
Three situations make the kit route clearly correct rather than merely defensible.
The first is an upgrade path. If you own a monocular with a good tube and you want a binocular, buying a second tube and a housing gets you there without paying for a tube you already have.
The second is a specific mission requirement. Wide-field lenses, a particular gain interface, or a lighter finished weight are all choices you can only make when the housing and the optics are bought separately.
The third is fleet maintenance. An organisation running a number of goggles benefits from holding a spare housing, because a cracked shell or a failed bridge can then be repaired by transplanting known-good tubes rather than by sending the whole unit away. For that use, buying the housing and keeping it on the shelf is straightforwardly cheaper than downtime.
Choosing between the two paths
Buy the housing kit when you already own a tube or a matched pair, when you want a specific lens set, or when you have access to a bench with purge and diopter equipment.
Buy the complete unit when this is your first device, when you have one tube and want a binocular, or when you have no purge access. The complete unit arrives tested, purged and collimated, and the price difference is mostly the tube you would have had to buy anyway. For a first monocular, comparing configurations within our monocular night vision range is a more productive exercise than pricing a build.
A last note on expectations. A housing kit is not a project that ends when the tubes are in. It ends when the goggle has been purged, collimated, diopter-set and tested against known values. Budget for that final step at the start and the build will go well.
Frequently Asked Questions
Is a night vision housing kit cheaper than buying a complete unit?
Only if you already own suitable tubes or can source them below the bundled price. The housing is a largely fixed cost and the tubes are the variable, so buying both separately at retail saves very little. The real benefit of a housing kit is control over tube grade, phosphor, gating and lens choice.
Will an MX-11769 tube fit a BNVD-1431 MK2 housing?
Yes, after a minor modification to the pod. The housing is designed around the MX-10160 18 mm format. Because the modification requires opening the pod, plan for a nitrogen purge and leak check afterwards, and price that into the decision before buying the tube.
Do I have to purge the pods after installing tubes?
Yes. The pods hold dry nitrogen so internal glass does not fog during temperature changes. Opening a pod admits humid air. Refilling requires drying the assembly, filling with dry nitrogen through the purge valve fitting, and then leak-checking the seal.
Can I build a binocular from two tubes bought at different times?
You can, but expect to have them matched. Two tubes with similar figures of merit can still differ in gain and in screen brightness, and your eyes will notice the mismatch within about twenty minutes of use. Ask for the data sheets before buying and have the finished goggle gain-matched on a bench.
What tools do I actually need for a first build?
A spanner set sized for the retaining and lock rings, a diopter test device if you intend to set diopter yourself, and access to nitrogen purge equipment. Ordinary pliers and improvised tools damage ring slots and threads, which turns a reversible job into a parts replacement.