
Cart
0
Introduction
When buying, building, or upgrading a night vision device, the image intensifier tube is the most important performance component.
A housing can be lightweight.
A mount can be stable.
A lens system can be sharp.
But if the tube has problems, the final image will suffer.
That is why tube inspection matters.
Whether you are comparing Gen 2+ tubes, Gen 3 tubes, white phosphor tubes, green phosphor tubes, MX10160 tubes, MX11769 tubes, or NNVT image intensifier tubes, a basic tube test process can help you better understand what you are actually buying.
Common questions include:
-
How do I test a night vision tube?
-
How do I inspect image intensifier tube blemishes?
-
What should I check before installing a tube?
-
Can I test night vision tubes at home?
-
What is a diopter tube test device used for?
-
How do I check tube focus, spots, and image quality?
In this guide, we explain how users can evaluate night vision tubes at home, what a diopter tube test device does, what to look for during inspection, and when professional testing is still required.
For users comparing tube specifications before testing, start with What Is FOM in Night Vision? Understanding Image Intensifier Tube Specs.
What Is a Night Vision Tube Test?
A night vision tube test is the process of checking an image intensifier tube before or after installation.
The goal is to evaluate whether the tube produces a usable, clean, stable image.
A basic tube inspection may include checking:
-
Image brightness
-
Focus behavior
-
Dark spots
-
Blemishes
-
Shading
-
Edge clarity
-
Flicker
-
Noise
-
Image stability
-
Bright light response
-
Phosphor screen condition
-
Cosmetic defects
-
Compatibility with the housing
A complete professional test may require specialized equipment.
But a basic home inspection can still help users catch obvious problems before building or using a device.
Why Testing Image Intensifier Tubes Matters
Image intensifier tubes are precision electro-optical components.
Two tubes with the same general grade may still look different in real use.
For example, two tubes may have similar FOM numbers but differ in:
-
SNR
-
EBI
-
Halo
-
Gain
-
Resolution
-
Tube cosmetics
-
Brightness
-
Image cleanliness
-
Edge performance
This is why experienced users do not judge tubes by the label alone.
A tube spec sheet is important, but the visible image also matters.
Testing helps confirm whether the tube looks clean, stable, and usable.
If you are comparing tube grades, read Spec Breakdown: NNVT Gen2+ NVT5 vs NVT7 – Which Tube Should You Choose?.
What Is a Diopter Tube Test Device?
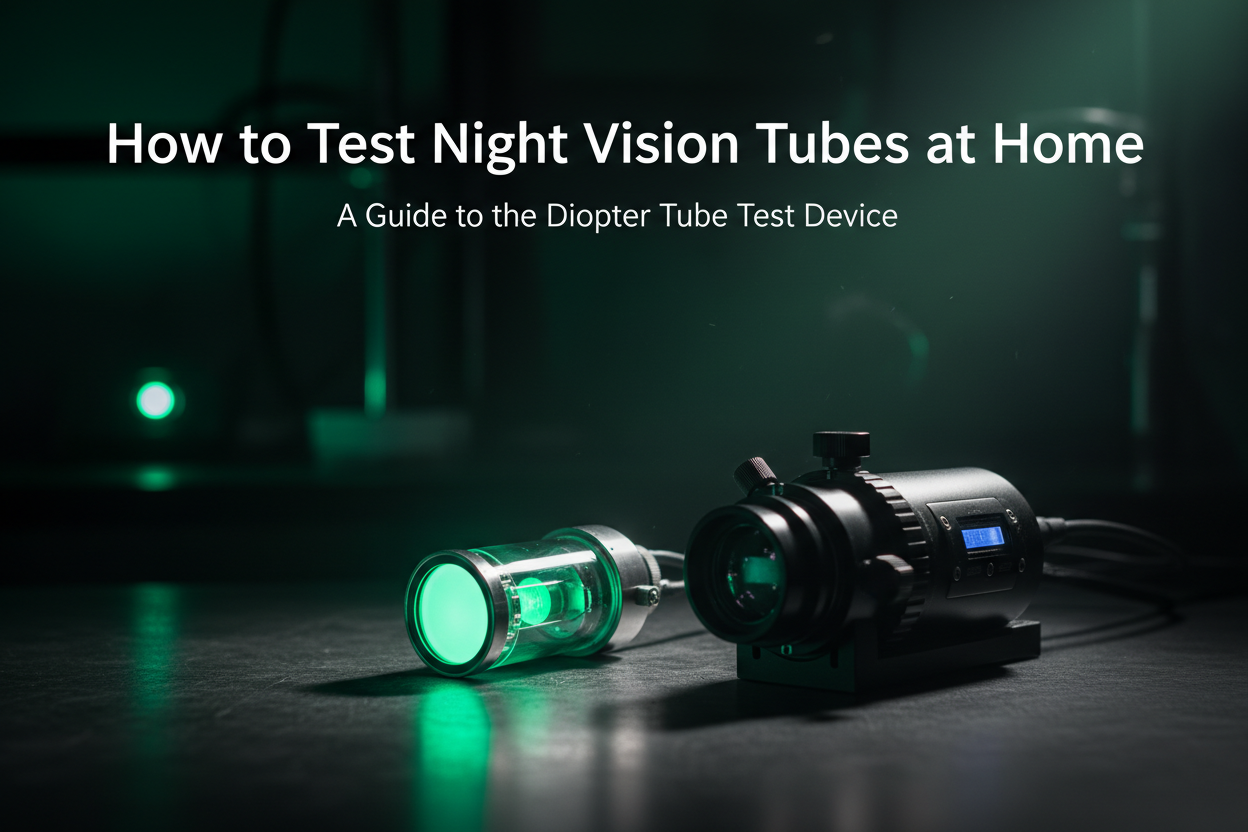
A diopter tube test device is a tool used to help inspect and evaluate a night vision image intensifier tube outside of a fully assembled night vision device.
Instead of immediately installing the tube into a housing, the user can use a test device to view the tube output and check basic visual performance.
A tool such as the Diopter tube test device can be useful for users who work with tubes, builds, maintenance, or inspection.
It can help users check basic tube image quality before committing to a full assembly.
This is especially useful for:
-
Builders
-
Technicians
-
Advanced night vision users
-
Tube buyers
-
Repair users
-
Users comparing multiple tubes
-
Users inspecting tube cosmetics
A diopter tube test device does not replace all professional calibration equipment, but it can be a practical inspection tool for basic tube evaluation.
What a Diopter Tube Test Device Can Help You Check
A tube test device can help you visually inspect several important areas.
1. Tube Brightness
A healthy tube should produce a visible image under appropriate low-light or controlled test conditions.
Brightness should be stable and usable.
If the image appears unusually dim, unstable, or inconsistent, further inspection may be needed.
2. Focus and Diopter Behavior
The term “diopter” relates to optical focus adjustment for the user’s eye.
A diopter test setup can help users check whether the viewed tube image can be focused clearly.
This matters because poor focus can make a tube appear worse than it actually is.
Before blaming a tube, always confirm that focus and viewing setup are correct.
3. Blemishes and Spots
Tube blemishes are one of the most common things users inspect.
Blemishes may appear as:
-
Dark spots
-
Small dots
-
Irregular marks
-
Shading
-
Screen imperfections
-
Fixed visual defects
Not every tiny spot makes a tube unusable.
Tube cosmetic grading often depends on:
-
Spot size
-
Spot position
-
Zone location
-
Quantity
-
Visibility during actual use
A small spot near the outer edge may be less distracting than a larger spot in the center.
4. Shading
Shading refers to uneven brightness across the tube image.
A tube may appear brighter in one area and darker in another.
Minor variation may be acceptable depending on tube grade.
Heavy shading may be a concern.
During inspection, look for:
-
Dark edges
-
Uneven brightness
-
Large shadowed zones
-
Irregular screen tone
-
Abnormal dark patches
Shading can affect viewing comfort and image quality.
5. Flicker or Instability
A tube image should be stable under appropriate test conditions.
If the image flickers, cuts out, pulses, or behaves unpredictably, possible causes may include:
-
Power supply issue
-
Tube issue
-
Contact issue
-
Test setup issue
-
Housing compatibility issue
-
Connection problem
Do not immediately assume the tube is bad.
Check the test device, contacts, and power setup first.
6. Edge Quality
Edge quality affects how usable the full image feels.
A tube may look acceptable in the center but weak around the edge.
Some edge softness may come from optics rather than the tube itself, but visual inspection can still help identify obvious problems.
For more about optical causes of image issues, read What Causes Distortion in NVGs? The Difference Between Aspherical and Spherical Lenses.
Home Testing vs Professional Testing
It is important to understand the limits of home tube testing.
A home test can help you observe obvious visual issues.
Professional testing can measure and verify precise specifications.
Home Testing Can Help With:
-
Basic image inspection
-
Visible blemish check
-
General brightness observation
-
Obvious instability detection
-
Basic focus check
-
Tube comparison
-
Pre-assembly screening
Professional Testing Can Measure:
-
Resolution
-
FOM
-
SNR
-
EBI
-
Halo
-
Gain
-
Photocathode sensitivity
-
Collimation in complete devices
-
Optical alignment
-
Tube matching
A diopter tube test device is useful, but it is not a full laboratory tester.
For high-end builds, professional testing is still recommended.
ARGUS states on its About Us page that it uses US/NATO-standard gear, including HOFFMAN ANV-126A equipment, for diopter calibration, optical collimation, image tube inspection, and gain matching.
You can read more on the About Us page.
What You Need Before Testing a Tube at Home
Before testing an image intensifier tube, prepare carefully.
You may need:
-
A compatible tube test device
-
Safe power source
-
Clean work area
-
Low-light environment
-
Lens-safe cleaning tools
-
Gloves or clean handling method
-
Dust-free storage area
-
Tube spec sheet
-
Basic inspection checklist
Avoid testing tubes in uncontrolled bright light.
Do not expose image intensifier tubes to unnecessary strong light.
Improper handling can damage the tube or affect performance.
Safety Notes Before Testing Night Vision Tubes
Image intensifier tubes are sensitive electronic and optical components.
Before testing, follow these safety principles:
1. Avoid Bright Light Exposure
Do not point the tube toward direct sunlight, strong flashlights, lasers, or intense artificial lights.
Even tubes with bright light protection should be handled carefully.
For more information, read Auto-Gated vs Non-Gated Night Vision: What’s the Real Difference?.
2. Handle the Tube Carefully
Avoid touching optical surfaces.
Avoid dropping the tube.
Avoid applying pressure to the screen or input window.
3. Check Compatibility
Make sure the tube format matches the test setup.
Different tubes may use different formats, including:
-
MX10160
-
MX11769
-
2-pin
-
3-pin
-
Flying wire / pigtail
-
Manual gain formats
-
Fixed gain formats
If you are comparing tube formats, read The Truth About Flying Wires vs 3-Pin Tubes: Managing Manual Gain Control.
4. Keep the Work Area Clean
Dust and debris can create false visual problems.
A dirty optical surface may look like a tube blemish.
Clean environment matters.
5. Do Not Disassemble Beyond Your Skill Level
If you are not trained in night vision assembly, do not attempt advanced repairs.
A test device can help with inspection, but complex repair and calibration should be handled by qualified technicians.
Step-by-Step: How to Test a Night Vision Tube at Home
The exact procedure depends on the tube and test device, but a basic inspection process may look like this.
Step 1: Confirm Tube Type
Before powering anything, confirm what tube you are testing.
Check whether the tube is:
-
MX10160
-
MX11769
-
2-pin
-
3-pin
-
Flying wire / pigtail
-
Manual gain
-
Fixed gain
This matters because the wrong setup may not work correctly.
If the tube has a spec sheet, keep it nearby.
Step 2: Inspect the Tube Physically
Before powering the tube, visually inspect it.
Check for:
-
Cracked glass
-
Damaged contacts
-
Bent pins
-
Loose wires
-
Contaminated surfaces
-
Signs of moisture
-
Physical damage
-
Missing components
Do not power a tube that appears physically damaged.
Step 3: Prepare a Controlled Low-Light Environment
Testing should be done in a controlled low-light space.
Avoid bright rooms.
Avoid direct light sources.
Avoid pointing the tube toward windows, lamps, flashlights, or reflective surfaces.
A controlled environment helps protect the tube and makes inspection easier.
Step 4: Install the Tube into the Test Device
Install the tube according to the test device requirements.
Be gentle.
Make sure contacts are aligned properly.
Do not force the tube into place.
If something does not fit, stop and verify compatibility.
The Diopter tube test device product page is the relevant product page for this type of tool.
Step 5: Power the Device Carefully
Once installed, power the test device under safe lighting conditions.
Look for:
-
Stable startup
-
Normal image appearance
-
No sudden flicker
-
No abnormal noise or behavior
-
No immediate failure
If the image behaves abnormally, power down and inspect the setup.
Step 6: Adjust Focus / Diopter
Adjust the viewing focus until the image appears as sharp as possible.
Do not judge tube sharpness until focus is properly set.
A poorly adjusted diopter can make a good tube look blurry.
Check the center image first, then scan toward the edges.
Step 7: Inspect for Spots and Blemishes
Look for visible dark spots or marks.
Pay attention to:
-
Center zone
-
Middle zone
-
Edge zone
-
Spot size
-
Spot quantity
-
Spot visibility
-
Whether the spot moves when optics move
If a mark moves when the optical surface is cleaned or adjusted, it may be dust or debris rather than a tube blemish.
If it stays fixed in the image, it may be tube-related.
Step 8: Check Image Evenness
Observe whether the image brightness is consistent.
Look for:
-
Dark edges
-
Bright center
-
Uneven shading
-
Large shadowed areas
-
Abnormal gradients
-
Flickering brightness
Some variation may be normal depending on tube grade, but obvious unevenness should be noted.
Step 9: Check Image Noise
Image noise may appear as grain, sparkle, or scintillation.
Some noise is normal in very low-light conditions.
Higher SNR tubes usually produce a cleaner image.
If the image is extremely noisy under reasonable conditions, check:
-
Ambient light level
-
Tube grade
-
SNR value
-
Power stability
-
Test setup
For more about tube specs, read Spec Breakdown: NNVT Gen2+ NVT5 vs NVT7 – Which Tube Should You Choose?.
Step 10: Record Your Observations
If you are comparing multiple tubes, write down what you see.
Record:
-
Tube model
-
Serial number
-
Phosphor type
-
FOM
-
SNR
-
Resolution
-
EBI
-
Halo
-
Visible blemishes
-
Brightness impression
-
Image noise
-
Any abnormal behavior
This helps you compare tubes more objectively.
What to Look for During Tube Testing
When testing night vision tubes, focus on practical usability.
Clean Image
The image should not have distracting central defects.
Stable Output
The tube should not flicker, pulse, or cut out unexpectedly.
Usable Brightness
The image should appear bright enough under proper conditions.
Acceptable Noise
Some scintillation is normal in low light, but excessive noise may be a concern.
Minimal Shading
Heavy uneven shading can reduce usability.
Good Focus
The image should be focusable and comfortable to view.
Format Compatibility
The tube should match your intended housing or build.
Understanding Tube Blemish Zones
Tube blemishes are often evaluated by zones.
Although exact grading standards vary, users commonly think of the image in three areas:
Zone 1: Center
This is the most important area.
A visible blemish in the center is usually more distracting.
Zone 2: Middle Area
Blemishes here may be acceptable depending on size and quantity.
Zone 3: Outer Edge
Small blemishes near the edge are usually less distracting during real use.
When inspecting a tube, do not only count spots.
Also consider where they are.
A small edge spot may matter less than a central spot.
Tube Specs You Should Compare Alongside Visual Testing
A visual test is useful, but it should be paired with the spec sheet.
Important specifications include:
FOM
A general performance number based on resolution and SNR.
SNR
Signal-to-noise ratio. Higher SNR usually means a cleaner image.
Resolution
Measured in line pairs per millimeter. Higher resolution can help with fine detail.
EBI
Equivalent Background Illumination. Lower EBI can help in very dark environments.
Halo
Lower halo means less glow around bright light sources.
Gain
Affects image brightness and amplification.
Phosphor Type
White phosphor and green phosphor provide different viewing experiences.
Auto-Gating
Helps with changing light conditions.
Tube Format
MX10160, MX11769, 2-pin, 3-pin, or pigtail format can affect housing compatibility.
Visual testing and spec sheet review should be used together.
Testing Tubes for PVS-14 Builds
PVS-14 style builds are one of the most common reasons users inspect tubes.
Before installing a tube into a PVS-14 style housing, check:
-
Tube format
-
Manual gain compatibility
-
Tube blemishes
-
Brightness
-
Noise
-
Focus behavior
-
Spec sheet values
-
Housing compatibility
A PVS-14 build may use different tube formats depending on the housing and gain control setup.
If you are still deciding on device type, read PVS-14 vs PVS-31: Which Night Vision Device Is Right for You?.
Testing Tubes for Binocular NVGs
Binocular night vision devices use two tubes.
This makes tube testing more important.
For binocular systems, you should compare:
-
Brightness between both tubes
-
Phosphor color consistency
-
SNR
-
FOM
-
Resolution
-
EBI
-
Halo
-
Tube cosmetics
-
Image tone
-
Gain behavior
Two individually good tubes may still feel uncomfortable if they are poorly matched.
For binocular builds, tube matching matters.
If you are comparing binocular systems, read BNVD-1431 MK2 vs Traditional NVGs: A Comprehensive Review.
Testing Tubes for PNVG / Quad-Tube Systems
Panoramic night vision systems are even more demanding.
A quad-tube system requires four tubes.
For systems like PNVG-style builds, tube matching is critical.
You need to consider:
-
Brightness matching
-
Image tone matching
-
Resolution matching
-
Gain matching
-
Tube cosmetics
-
Edge performance
-
Collimation after assembly
A tube that works well alone may not be ideal in a four-tube panoramic system if it does not match the others.
For more on panoramic systems, read 97-Degree Panoramic Field of View: Is the PNVG-18 Housing Kit Worth the Investment?.
Common Mistakes When Testing Night Vision Tubes
Mistake 1: Testing in Too Much Light
Bright light can affect the tube and may risk damage.
Always use controlled lighting.
Mistake 2: Judging Sharpness Before Adjusting Focus
Incorrect diopter or focus settings can make a good tube look bad.
Mistake 3: Confusing Dust with Tube Blemishes
Dust on optical surfaces may look like tube defects.
Clean carefully and inspect again.
Mistake 4: Ignoring Compatibility
A tube may look good but still be wrong for your housing.
Mistake 5: Only Looking at FOM
FOM matters, but SNR, EBI, halo, cosmetics, and tube format also matter.
Mistake 6: Assuming Home Testing Replaces Professional Testing
Home testing is useful, but it cannot replace certified measurement and calibration equipment.
When Should You Use a Professional Tester?
Professional testing is recommended if you need to verify:
-
Accurate resolution
-
FOM
-
SNR
-
EBI
-
Halo
-
Gain
-
Tube matching
-
Device collimation
-
Diopter calibration
-
Optical alignment
-
Warranty claims
-
High-end build quality
Home inspection is useful for screening.
Professional testing is needed for precision verification.
For professional build quality, calibration, and inspection information, visit the About Us page.
Who Should Consider a Diopter Tube Test Device?
A tube test device is most useful for:
-
Night vision builders
-
Repair users
-
Tube resellers
-
Advanced hobbyists
-
Users comparing multiple tubes
-
Users building PVS-14 style devices
-
Users building binocular NVGs
-
Users inspecting spare tubes
-
Users checking tube cosmetics before installation
Casual users who only buy complete night vision devices may not need one.
But for anyone handling loose image intensifier tubes, a test device can be a practical tool.
Where to Find Tube Testing and Build-Related Products
If you are building, testing, or maintaining night vision devices, these pages may help:
Related guides:
-
What Is FOM in Night Vision? Understanding Image Intensifier Tube Specs
-
Spec Breakdown: NNVT Gen2+ NVT5 vs NVT7 – Which Tube Should You Choose?
-
Auto-Gated vs Non-Gated Night Vision: What’s the Real Difference?
-
The Truth About Flying Wires vs 3-Pin Tubes: Managing Manual Gain Control
-
What Causes Distortion in NVGs? The Difference Between Aspherical and Spherical Lenses
Final Thoughts
Testing a night vision tube before installation can help users avoid costly mistakes.
A basic home inspection can reveal visible blemishes, focus problems, shading, flicker, and obvious image quality issues.
A diopter tube test device gives builders and advanced users a practical way to inspect image intensifier tubes before committing to a full device assembly.
However, home testing has limits.
It does not replace professional measurement of FOM, SNR, EBI, halo, gain, resolution, tube matching, or collimation.
The best approach is to combine both:
Use a tube test device for basic visual inspection.
Use professional equipment and qualified technicians for precision testing and final assembly.
If you are buying, building, or comparing image intensifier tubes, do not rely on a grade name alone.
Check the spec sheet.
Inspect the image.
Confirm compatibility.
And make sure the tube fits your real night vision setup before you build around it.